Showing posts with label paper crafts. Show all posts

Tuesday, June 24, 2014

Patriotic Flag Craft


Supplies needed: 
Popsicle stick or larger tongue depressor stick
White cardstock
Blue paper (construction paper/scrapbook paper/etc.)
Red ribbon
Silver star stickers (or paper stars if you have a star punch)
Elmer's glue


I did this as an alternative to the very cute flag craft found here:  http://www.vanessasvalues.blogspot.com/2013/07/create-with-kids-popsicle-stick-flag.html 
Although I love the popsicle sticks, I needed something a little faster, easier, and less messy to put together that did not require hot glue and paint since I was doing this craft with a group of 4-6 year olds.  I also prepped everything ahead of time-- I had the white and blue papers cut to size as well as the ribbons cut to size, so all they needed to do with glue the pieces together and stick their star stickers on! 


Monday, May 5, 2014

"April Showers Bring May Flowers" Kid's Craft

This cool paper craft turns a raindrop magically into a flower!


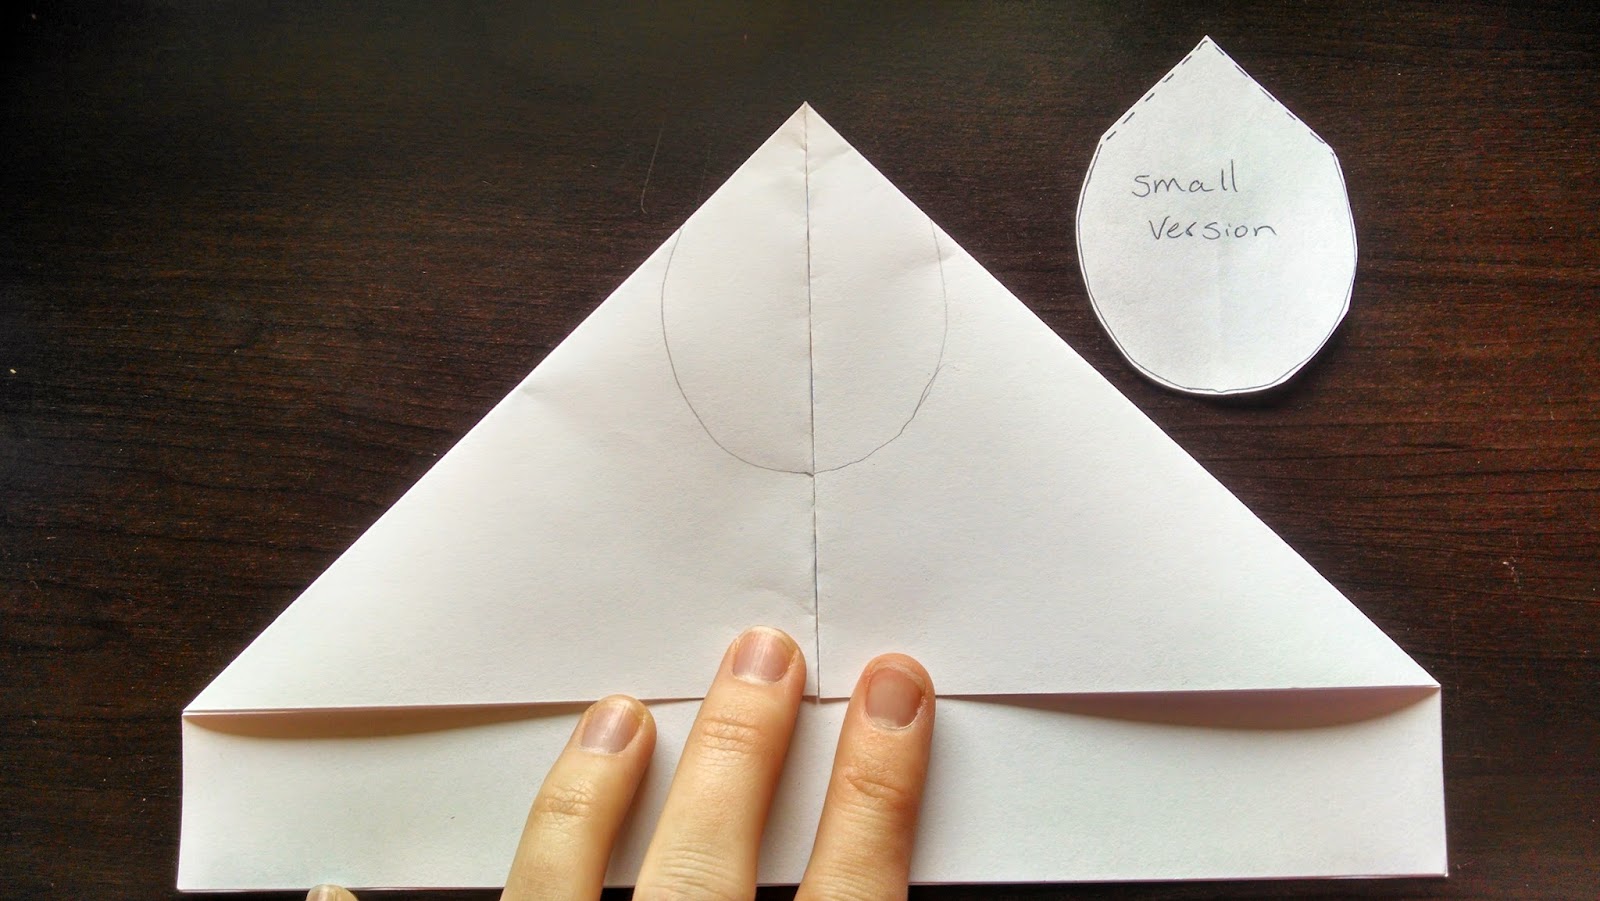
1. Fold a piece of paper or cardstock in half. 


 2. Find the middle of that. Either make a very light fold or a light pencil mark that can later be erased.

3. Fold one side inward to that center mark.

4. Fold the other side inward to the center forming a point.

5. Keeping the paper folded, use the template below to trace and cut out the raindrop shape. You only need to cut a "U" shape-- leave the point and top folds intact.


6. The kids are now ready to do their "magic trick" by unfolding the raindrop to transform it into a flower.  Kids can decorate them by watercolors, crayons, markers, etc. as they learn the phrase "April showers bring May flowers!" 


Here is the template you can cut out to use for tracing. The dotted line is simply where the edges line up where you folded the paper. DO NOT CUT THE FOLDED EDGE. 


 Here are some examples of ones that were made in my class:


Tuesday, November 20, 2012

Sheet Music Spiral Ornament

This is a variation of the paper ornament found on this blog:  http://www.tinkerwithink.com/2011/12/xmas-blitz-day-18-paper-snowflake.html

I had started making this ornament with vintage sheet music, but the paper was too brittle and was breaking with every tiny crease and roll since each section is made with a 2 inch square. So I decided to make a much bigger version for hanging in windows or archways instead of on a tree. 

I started by cutting a 6 inch x 6 inch square of paper. 

Fold it diagonally. Start from the outside edge, measure in 1 inch and make a mark. Measure 1 more inch from that mark and make another mark, and then one more time. (You should have 3 marks). Then flip it over and start from the other end and do the same thing until you have 6 marks total. 

You will then cut a straight line, following the direction of the paper edge, starting at each mark you made. I found it easiest to do both of the outer most marks first and then work my way in. Cut until there is between 3/4 to 1 inch between the right and left cut lines in the center.  You do not want to go too far into the center or it will not stay in tact (just like the center fold on a paper snowflake). 


When you have all of your lines cut, it should look like this:
 

Next you will unfold the paper and find the small center square. Take a small piece of double sided tape and secure one corner to the other to create a small rolled paper loop.

Turn the paper over to the other side. Take the next center square and do the same thing, attaching the corners together with double sided tape.  Repeat this 2 more times, flipping the paper over to make the loops on opposite sides.

Voila! You can use a small paper punch to punch out a hole to loop string through to hang it from if you'd like. 

I hung 6 of these in a window at various lengths.